Best Equipment by Build
This guide covers the exact equipment pieces to target for every build — the best set, the best base items (red drops), and why. No more guessing.
How Equipment Stacks Work
Every equipment slot has three layers of stats that matter:
- Set Bonus — Yellow (standard) and Red (excellent) bonuses from wearing 2/3/4 matching set pieces
- Base Item — The specific named item (e.g. "Reptao Rock Armor") determines your permanent top stats (HP, DEF, ATK) and special stat (Block Rate, Fire Amp, etc.)
- Affixes — The rerollable blue stats at the bottom
You can mix sets and base items. Your armor can be a Moogle set piece AND still be the highest-HP base. The set determines which bonuses you get at 2/3/4pc; the base item determines the locked top stats. This guide tells you both.
Class Equipment Restrictions
Equipment slots are strictly class-locked for weapons and armor:
| Class | Weapon | Armor | Ring | Amulet |
|---|---|---|---|---|
| Warrior | Sword only | Heavy only | Universal | Universal |
| Archer | Bow only | Leather only | Universal | Universal |
| Mage | Staff only | Robe only | Universal | Universal |
Rings and Amulets are shared across all classes. All recommendations below respect these restrictions.
Understanding Yellow vs Red Set Bonuses
Every set has two bonus tracks that activate simultaneously:
| Track | Color | Source | Bonuses |
|---|---|---|---|
| Standard | Yellow | Always active | Combat stats (Block, CDR, Crit, etc.) |
| Excellent | Red | Requires red-quality set pieces | Powerful procs and multipliers |
You get both tracks at once. A 4pc Moogle with red pieces gives you ALL of: +15% Block, +200 Pure DEF, +100% HP Recovery (yellow) AND +25% Base HP, ATK/DMG -35% + lost HP heal every 12s (red).
Red bonuses are the endgame power spike. Yellow bonuses are good; red bonuses are build-defining. Prioritize upgrading set pieces to red quality.
Quick Reference — Best Set Per Build
| Build | Class | Best Set | Key Red Bonus | Best Base Items |
|---|---|---|---|---|
| Poison Archer | Archer | Fordedid | Shield + 35% Crit during shield | Perish (Bow) + Spy Leather |
| Volley Archer | Archer | Dark Ranger | 50% Dodge opener + Silence proc | Flemrad (Bow) + Vanguard Leather |
| Multi-Shot Archer | Archer | Belissar | Skill DMG/CDR + ATK Speed/Auto DMG | Belissar (Bow) + Belissar Leather |
| Rapid Fire (Ice) | Archer | Maruka | Ice Amp/Resist + Freeze AoE | Fronihesis (Bow) + Vanguard Leather |
| Rapid Fire (Phys) | Archer | Shadow Fighter | 20% Kill Heal + ATK/DEF stacks | Flemrad (Bow) + Vanguard Leather |
| Pet Summon Archer | Archer | 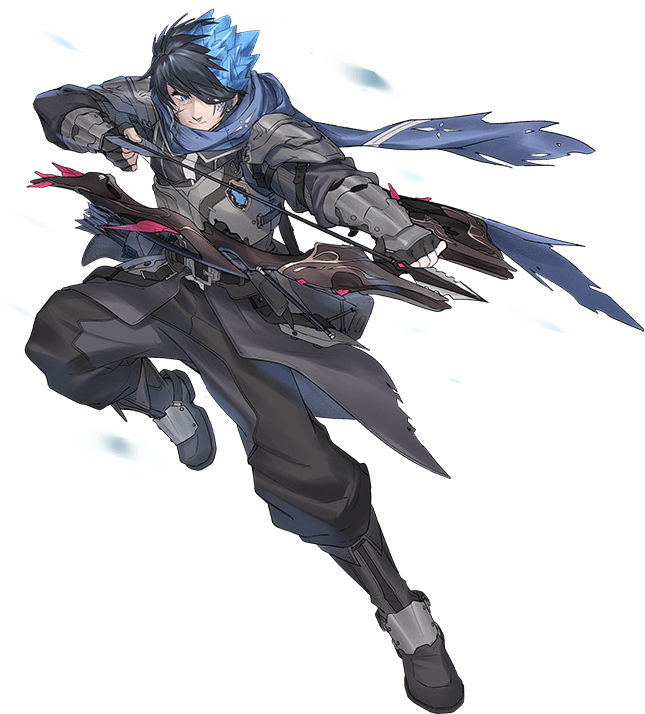 Guttorm Guttorm |
Summon DMG/DR + HP/Summon Inherit | Sprelrz (Bow) + Beastmaster Leather |
| Healer Mage | Mage | Vilanova Oath | Levipower DMG + MP regen | Erelica (Staff) + Chant Robe |
| Ice Cone Mage | Mage | Maruka | Ice Amp/Resist + Freeze AoE | Briza (Staff) + Ace Robe |
| Firebolt Mage | Mage | Lava Sacrifice | Death Firebolt + HP/DEF +20% | Filem (Staff) + Furan Robe |
| Blast Mage | Mage | Burning Ground | Fire Amp +15% + Burn All enemies | Filem (Staff) + Furan Robe |
| Fire Snake Mage | Mage | Guttorm |
Summon DMG/DR + HP/Summon Inherit | Filem (Staff) + Furan Robe |
| Fire Snake (Ice) | Mage | Wotan | Auto/Summon DMG + Fire/Ice/Summon Crit | Briza (Staff) + Ace Robe |
| Taunt Warrior | Warrior |  Moogle Moogle |
+25% Base HP + Lost HP heal/12s | Stonbre (Sword) + Reptao Rock |
| Whirlwind Warrior | Warrior | Lilith | Crit DMG/Lightning Res + Lightning AoE stun | Excalika (Sword) + Rune Crystal |
| Shield Wall | Warrior | Moogle |
+25% Base HP + Lost HP heal/12s | Stonbre (Sword) + Orr Brass |
| Ground Slash (Auto) | Warrior | Shackled Enemy | ATK/DMG +5% + Auto Crit Shred | Igniir (Sword) + Reptao Rock |
| Ground Slash (Burst) | Warrior | Gudrun | Skill DMG +10% + Ground Slash +45% Crit | Gudrun Sword + Rune Crystal |
| Leap Slash | Warrior | Cruel Angel | ATK Speed +30% + Death doubles team buffs | Excalika (Sword) + Reptao Rock |
Archer Builds
 Poison Archer
Set: Fordedid — 4pc
| Pc | Yellow Bonus | Red Bonus |
|---|---|---|
| 2 | +10% all element ATK% | Ally element resist + crit immunity +15% |
| 3 | Full HP → +15% DMG | — |
| 4 | 10% ATK → all element DMG | Start with shield (200% ATK), +35% Crit during shield |
Why Fordedid: Poison is elemental — all bonuses apply. The 4pc yellow converts 10% ATK into poison DMG, giving your DoTs ATK scaling they normally don't have. Red 4pc's opening shield keeps you at full HP for the 3pc +15% DMG bonus, and the +35% Crit during shield means your opening poison stacks hit harder.
Best Base Items:
| Slot | Item | Base Stats (max) | Special | Why |
|---|---|---|---|---|
| Weapon | Perish (Bow) | ATK 4,062 / DEF 937 | Poison Amp | Only bow with Poison Amp top stat — directly scales DoT ticks |
| Armor | Spy Leather | HP 45,625 / DEF 2,687 | Skill CDR | No leather has Poison Amp — Skill CDR is next best, giving faster poison arrow casts for more DoT stacks. Also highest HP leather |
| Ring | Fordedid Ring | HP 15,750 / ATK 1,575 | Poison ATK% | Set piece. Poison ATK% special feeds elemental scaling |
| Amulet | Cunning Heart | HP + DEF | Skill CDR | Faster poison arrow cooldown = more DoT stacks |
Affix Priority: Poison ATK% > Equipment ATK% > Skill DMG%
 Volley Archer
Set: Dark Ranger — 4pc
| Pc | Yellow Bonus | Red Bonus |
|---|---|---|
| 2 | +2 Range | 50% Dodge for 10s at battle start |
| 3 | +700 Pure ATK | — |
| 4 | Five Shot +30% DMG | 15% chance to Silence target 4s on auto-attack |
Why Dark Ranger: The 4pc yellow gives +30% Five Shot DMG — a direct multiplier on every Quintuple Shot hit. +700 Pure ATK is massive flat damage. Red 2pc's 50% Dodge opener keeps you alive during setup, and the red 4pc Silence shuts down dangerous casters.
Best Base Items:
| Slot | Item | Base Stats (max) | Special | Why |
|---|---|---|---|---|
| Weapon | Flemrad (Bow) | ATK 4,812 | Auto DMG | Auto DMG boosts filler autos that build  Fear of Fear shadow arrow stacks between volleys. 2nd highest ATK bow Fear of Fear shadow arrow stacks between volleys. 2nd highest ATK bow |
| Armor | Vanguard Leather | HP 45,000 / DEF 3,312 | Crit DMG | 5 shots per volley = 5 independent crit chances. Crit DMG top stat multiplies every crit across the entire burst. High HP for survivability |
| Armor | Hunter Leather | HP 37,500 / DEF 4,250 | Crit Rate | Alternative: Crit Rate if you haven't capped crit yet. Highest DEF leather, tankier |
| Ring | Dominator Ring | ATK + DEF | DMG Bonus | DMG Bonus is a flat multiplier on everything — auto, skill, and all 5 Five Shot hits |
| Amulet | Fatal Heart | HP + ATK + DEF | Crit DMG | 4 top stats. Crit DMG doubles down on the multi-hit burst — 5 crits per volley |
Affix Priority: Equipment ATK% > Crit Rate > Crit DMG
 Multi-Shot Archer
Set: Belissar — 4pc
| Pc | Yellow Bonus | Red Bonus |
|---|---|---|
| 2 | +50% Shield DMG | Skill DMG + CDR +10% |
| 3 | +20% Normal Monster DMG | — |
| 4 | Multi-Shot +15% DMG/Crit | ATK Speed + Auto DMG +30% |
Why Belissar: The 4pc literally buffs Multi-Shot by name. Red 4pc adds +30% ATK Speed and Auto DMG for your filler autos. Red 2pc adds +10% Skill DMG on top of TR-300's +70%, plus CDR to cast Multi-Shot more often.
Best Base Items:
| Slot | Item | Base Stats (max) | Special | Why |
|---|---|---|---|---|
| Weapon | Belissar Bow | ATK 4,095 | Normal DMG | Set piece. Normal DMG boosts your auto-attack filler between Multi-Shot cooldowns — stacks with set 3pc (+20% Normal DMG) |
| Armor | Belissar Leather | HP 28,875 / DEF 4,200 | Skill DMG | Set piece. Skill DMG directly multiplies Multi-Shot and stacks with  TR-300's +70%. Lower HP than other leathers — compensate with Emerald gems TR-300's +70%. Lower HP than other leathers — compensate with Emerald gems |
| Ring | Belissar Ring | ATK 3,150 | Shield DMG | Set piece. Highest pure ATK ring in the game — raw ATK feeds Tier 3A's stacking mechanic (+3% ATK per target hit, x50) |
| Amulet | Belissar Amulet | HP 18,375 / ATK 1,837 | Shield DMG | Set piece for 4pc. High HP compensates for low-HP armor. Or Fatal Heart (Crit DMG) if you already have 4pc from other slots |
Affix Priority: Equipment ATK% > Crit Rate > Skill DMG%
 Rapid Fire Archer
T4A — Ice Path
Set: Maruka — 4pc
| Pc | Yellow Bonus | Red Bonus |
|---|---|---|
| 2 | +30% Ice ATK% | Ice Amp + Ice Resist +10% |
| 3 | Auto 15% freeze | — |
| 4 | Ice Arrow +40% DMG | Ice Amp +10%, freeze all enemies after 10s |
Why Maruka: T4A converts all autos to ice arrows — Maruka 4pc gives +40% DMG to every hit. During Rapid Fire's doubled ATK speed, the 3pc 15% freeze procs constantly for crowd control. Red 4pc adds another +10% Ice Amp and a 10s AoE freeze.
Best Base Items:
| Slot | Item | Base Stats (max) | Special | Why |
|---|---|---|---|---|
| Weapon | Fronihesis (Bow) | HP 3,750 / ATK 4,562 | Ice Amp | Only bow with Ice Amp. Direct ice scaling on every auto-attack |
| Armor | Vanguard Leather | HP 45,000 / DEF 3,312 | Crit DMG | No leather has Ice Amp — Crit DMG is best DPS alternative. During Rapid Fire's doubled ATK speed, Tier 1B gives +50% crit rate and every crit benefits from this top stat. 2nd highest HP leather |
| Ring | Maruka Ring | HP 15,750 / ATK 2,100 | Crit Rate | Set piece. Crit Rate feeds into Tier 1B's crit window during Rapid Fire |
| Amulet | Maruka Amulet | HP 15,750 / ATK 2,100 | Anti-Crit | 4pc completion. Anti-Crit helps survive melee range during haste windows |
T4B — Physical Path
Set: Shadow Fighter — 4pc
| Pc | Yellow Bonus | Red Bonus |
|---|---|---|
| 2 | +30% Crit DMG | 20% HP heal on kill |
| 3 | +30% Normal Monster DMG | — |
| 4 | Frenzy (kill: +10% DMG/ATK Spd/Crit, 10s, x10 stacks) | Kill → +10% ATK/DEF for 10s (x10 stacks) |
Why Shadow Fighter: Rex Savage + Rapid Fire = constant kills in farming content. At 10 Frenzy stacks: +100% DMG, ATK Speed, Crit. Red 4pc adds another +100% ATK/DEF on top. Combined with Rapid Fire's base double ATK speed, you reach maximum attack rate.
Best Base Items:
| Slot | Item | Base Stats (max) | Special | Why |
|---|---|---|---|---|
| Weapon | Flemrad (Bow) | ATK 4,812 | Auto DMG | Auto DMG directly scales every auto-attack — the core of this build. 2nd highest ATK bow |
| Armor | Vanguard Leather | HP 45,000 / DEF 3,312 | Crit DMG | Crit DMG compounds with Rex Savage's per-auto stacking (+1.5% Crit DMG per stack, x50). High HP cushions T4B's 25% HP sacrifice |
| Ring | Shadow Fighter Ring | HP 10,500 / ATK 2,100 | Crit Rate | Set piece. Crit Rate seeds Frenzy stacking — each kill requires a crit to maximize burst |
| Amulet | Shadow Fighter Amulet | HP 10,500 / ATK 2,100 | Crit Rate | 4pc completion. Double crit from ring + amulet specials |
Affix Priority: Equipment ATK% > Crit Rate > ATK Speed
 Pet Summon Archer
Set: Guttorm — 4pc
| Pc | Yellow Bonus | Red Bonus |
|---|---|---|
| 2 | +20% Summon Crit | Summon DMG + DR +20% |
| 3 | +30% Summon DR | — |
| 4 | +35% Summon ATK Speed | HP +25%, Summon Inherit +25% |
Why Guttorm: Every bonus directly buffs your pets. Yellow 4pc's +35% Summon ATK Speed stacks with Mars's +50% for +85% total — pets attack nearly twice as fast. Red 4pc's +25% HP keeps you alive while +25% Summon Inherit means pets get more of your stats.
Best Base Items:
| Slot | Item | Base Stats (max) | Special | Why |
|---|---|---|---|---|
| Weapon | Sprelrz (Bow) | ATK 4,062 / DEF 937 | Summon DMG | Only bow with Summon DMG. Directly multiplies all pet damage output. DEF bonus is rare on bows — helps archer survivability |
| Armor | Beastmaster Leather | HP 36,250 / DEF 4,375 | Summon Inherit | Only leather with Summon Inherit. Pets inherit 100% of your ATK/DEF — Summon Inherit% on top means pets get even more of your stats. Highest DEF leather |
| Ring | Guttorm Ring |
HP 23,625 / ATK 1,050 | Summon DMG | Set piece. Summon DMG multiplies all pet damage. Highest HP ring in the game — dead archer = dead pets |
| Amulet | Guttorm Amulet |
HP 10,500 / ATK 2,362 | Summon DMG | Set piece. Triple Summon DMG from weapon + ring + amulet. Highest ATK among summon-focused amulets |
Affix Priority: Equipment ATK% > Summon DMG% > Equipment HP%
Mage Builds
 Healer Mage
Set: Vilanova Oath — 4pc
| Pc | Yellow Bonus | Red Bonus |
|---|---|---|
| 2 | +10% Skill DMG | — |
| 3 | +10% ATK | — |
| 4 | +20% CDR | — |
Vilanova Oath is an Akasa set — it does not have red bonuses. Its yellow bonuses alone are the strongest healer package: CDR + ATK + Skill DMG.
Why Vilanova Oath: The 4pc +20% CDR stacks with Octopus King's +50% for near-permanent healing uptime. +10% ATK directly scales heal amounts. No other set provides this level of healing throughput.
Best Base Items:
| Slot | Item | Base Stats (max) | Special | Why |
|---|---|---|---|---|
| Weapon | Erelica (Staff) | ATK 4,750 | Skill CDR | Heals scale from ATK — 2nd highest ATK staff. CDR top stat stacks with  Octopus King (+50%) and Vilanova 4pc (+20%) for near-permanent heal uptime Octopus King (+50%) and Vilanova 4pc (+20%) for near-permanent heal uptime |
| Weapon | Shand (Staff) | ATK 5,062 | Skill CDR | Alternative: highest ATK staff in the game with same CDR special. Bigger heals if you can find one |
| Armor | Chant Robe | HP 41,875 / DEF 2,187 | Skill CDR | CDR stacking = more heals per minute. Dead healer = team wipe, so 2nd highest HP robe keeps you alive |
| Ring | Murmur Ring | HP + ATK | Heal Effect + Lightning Amp | Only ring with Heal Effect top stat. Heal Effect directly multiplies every heal cast — irreplaceable for healers |
| Amulet | Cunning Heart | HP + DEF | Skill CDR | Quadruple CDR stacking (weapon + armor + amulet + set). Every CDR point = more heals = more team survivability |
Affix Priority: Equipment ATK% > Skill DMG% > CDR
 Ice Cone Mage
Set: Maruka — 4pc
| Pc | Yellow Bonus | Red Bonus |
|---|---|---|
| 2 | +30% Ice ATK% | Ice Amp + Ice Resist +10% |
| 3 | Auto 15% freeze | — |
| 4 | Ice Arrow +40% DMG | Ice Amp +10%, freeze all enemies after 10s |
Why Maruka: The 2pc +30% Ice ATK% directly scales all ice damage through Silver Knight's 500% ice scaling. At 20 stacks (+80% ATK Speed), the 3pc freeze procs constantly. Red 4pc's AoE freeze at 10s provides a massive CC window.
Best Base Items:
| Slot | Item | Base Stats (max) | Special | Why |
|---|---|---|---|---|
| Weapon | Briza (Staff) | ATK 4,687 | Ice Amp | Ice Amp directly scales  Silver Knight's 500% ice melee hits. Highest ATK staff with Ice Amp Silver Knight's 500% ice melee hits. Highest ATK staff with Ice Amp |
| Armor | Ace Robe | HP 40,000 / DEF 2,625 | Ice Amp | Double Ice Amp stacking (weapon + armor). Silver Knight is melee range — you need HP, and Ace Robe is the only robe with Ice Amp |
| Ring | Sun Blaze Ring | HP + ATK + DEF | Skill DMG + Fire Amp | 5 top stats for raw stat budget. Skill DMG boosts Ice Cone's base hit. Fire Amp doesn't help ice but the 5 top stats outweigh |
| Amulet | Fatal Heart | HP + ATK + DEF | Crit DMG | 4 top stats. Crit DMG amplifies Silver Knight's fast melee crits at +80% ATK Speed |
Affix Priority: Ice ATK% > Equipment ATK% > Crit Rate
 Firebolt Mage
Set: Lava Sacrifice — 4pc
| Pc | Yellow Bonus | Red Bonus |
|---|---|---|
| 2 | +15% Skill DMG | On death: cast Firebolt + 2s stun |
| 3 | Firebolt +25% Crit | — |
| 4 | Firebolt +25% DMG | HP + DEF +20% |
Why Lava Sacrifice: The 3pc and 4pc literally name Firebolt. +25% Crit feeds T4A's crit loop (each crit: +10% Crit DMG, +5% Fire Amp). Red 4pc's +20% HP/DEF is huge for a squishy mage.
Best Base Items:
| Slot | Item | Base Stats (max) | Special | Why |
|---|---|---|---|---|
| Weapon | Filem (Staff) | HP 6,250 / ATK 4,562 | Fire Amp | Fire Amp scales every missile via 15x fire scaling. 9 missiles per cast (Tier 1A) = Fire Amp multiplied 9 times per rotation |
| Armor | Furan Robe | HP 40,625 / DEF 2,750 | Fire Amp | Double Fire Amp stacking (weapon + armor). Furan is the only robe with Fire Amp — irreplaceable for fire builds |
| Ring | Sun Blaze Ring | HP + ATK + DEF | Skill DMG + Fire Amp | Triple Fire Amp (weapon + armor + ring). Skill DMG stacks with  Gem Spider's +600% and Lava Sacrifice's +15% Gem Spider's +600% and Lava Sacrifice's +15% |
| Amulet | Fatal Heart | HP + ATK + DEF | Crit DMG | T4A crit loop: each crit → +10% Crit DMG, +5% Fire Amp (x30 stacks). Crit DMG top stat accelerates this loop |
Affix Priority: Fire ATK% > Equipment ATK% > Crit Rate
 Blast Mage
Set: Burning Ground — 4pc
| Pc | Yellow Bonus | Red Bonus |
|---|---|---|
| 2 | +15% Crit Rate | Fire Amp +15% |
| 3 | +15% Fire ATK% | — |
| 4 | Every 8s: -15% enemy Fire Resist | After 20s: continuous burn on all enemies |
Why Burning Ground: The 4pc yellow shreds Fire Resist every 8 seconds — at 15x base (45x with T1B1 upgrade) fire scaling, each point of resist reduction is enormous. Red 2pc adds +15% Fire Amp on top. Red 4pc's burn-all-enemies after 20s is a DPS check insurance.
Best Base Items:
| Slot | Item | Base Stats (max) | Special | Why |
|---|---|---|---|---|
| Weapon | Filem (Staff) | HP 6,250 / ATK 4,562 | Fire Amp | Fire Amp directly scales Great Fireball's 15x base (45x at T1B1) fire scaling |
| Armor | Furan Robe | HP 40,625 / DEF 2,750 | Fire Amp | Double Fire Amp stacking. At 15x–45x fire scaling, double Fire Amp from weapon + armor creates enormous base damage before  Boar King's multipliers Boar King's multipliers |
| Ring | Sun Blaze Ring | HP + ATK + DEF | Skill DMG + Fire Amp | Triple Fire Amp. Skill DMG boosts both regular Great Fireball and Supernova (guaranteed crit every 20s with 2x DMG) |
| Amulet | Fatal Heart | HP + ATK + DEF | Crit DMG | Supernova is guaranteed crit with 2x DMG — Crit DMG top stat directly multiplies the single highest damage event mages can produce. Boar King's 35% double-cast can duplicate it |
Affix Priority: Fire ATK% > Equipment ATK% > Skill DMG%
 Fire Snake Mage
Fire Path
Set: Guttorm — 4pc
| Pc | Yellow Bonus | Red Bonus |
|---|---|---|
| 2 | +20% Summon Crit | Summon DMG + DR +20% |
| 3 | +30% Summon DR | — |
| 4 | +35% Summon ATK Speed | HP +25%, Summon Inherit +25% |
Why Guttorm: The snake attacks every 0.75s — Guttorm 4pc's +35% ATK Speed reduces this to ~0.56s. Combined with Flame Lord's +100% Fire Amp and 25x fire scaling, faster snake attacks = massive DPS. Red 4pc's Summon Inherit means the snake gets 25% more of your fire stats.
Best Base Items:
| Slot | Item | Base Stats (max) | Special | Why |
|---|---|---|---|---|
| Weapon | Filem (Staff) | HP 6,250 / ATK 4,562 | Fire Amp | Fire Amp feeds directly into the snake's 25x fire scaling via stat inheritance. HP bonus keeps summoner alive |
| Armor | Furan Robe | HP 40,625 / DEF 2,750 | Fire Amp | Double Fire Amp stacking (weapon + armor). Snake inherits 60% of your ATK and your fire stats — Fire Amp on armor directly increases snake DPS |
| Ring | Guttorm Ring |
HP 23,625 / ATK 1,050 | Summon DMG | Set piece. Summon DMG directly multiplies all snake damage. Highest HP ring keeps summoner alive |
| Amulet | Guttorm Amulet |
HP 10,500 / ATK 2,362 | Summon DMG | Set piece. Double Summon DMG from ring + amulet |
Ice Path
Set: Wotan — 4pc
| Pc | Yellow Bonus | Red Bonus |
|---|---|---|
| 2 | +10% Skill CDR | Auto DMG + Summon DMG +15% |
| 3 | +20% Summon DMG | — |
| 4 | +35% Summon Duration | Fire/Ice Amp +25%, Summon Crit +25% |
Why Wotan: Ice snake has 50% chance to summon an advanced version (2x ATK, 2x duration). Wotan 4pc's +35% duration extends this window further. Red 4pc adds +25% Ice Amp for ice snake damage + +25% Summon Crit for snake crits.
Best Base Items:
| Slot | Item | Base Stats (max) | Special | Why |
|---|---|---|---|---|
| Weapon | Briza (Staff) | ATK 4,687 | Ice Amp | Ice snake inherits your ice stats — Ice Amp directly scales snake DPS through red 4pc's +25% Ice Amp stacking. Highest ATK staff with Ice Amp |
| Armor | Wotan Robe | HP 34,125 / DEF 2,625 | HP% | Set piece for 4pc. HP% special keeps summoner alive — dead mage = dead snake. Wotan 4pc's +35% Summon Duration requires wearing set pieces |
| Ring | Wotan Ring | HP 15,750 / ATK 1,575 | Summon Duration | Set piece. Summon Duration stacks with 4pc — extends the advanced snake's 2x ATK window (50% spawn chance). Longer uptime = more DPS |
| Amulet | Wotan Amulet | HP 18,375 / DEF 2,362 | Summon Duration | Set piece. Highest HP amulet among sets. Double duration from ring + amulet specials maximizes advanced snake uptime |
Affix Priority: Fire/Ice ATK% > Equipment ATK% > Summon DMG%
Warrior Builds
 Taunt Warrior
Set: Moogle — 4pc
| Pc | Yellow Bonus | Red Bonus |
|---|---|---|
| 2 | +15% Block Rate | +25% Base HP |
| 3 | +200 Pure DEF | — |
| 4 | +100% HP Recovery Effect | ATK/DMG -35%, heal lost HP every 12s |
Why Moogle: Rock Dragon's Dragon Protection stacks +32% DEF — Moogle 3pc adds +200 Pure DEF on top. The 4pc doubles all healing, directly offsetting Rock Dragon's 5% HP drain. Red 2pc's +25% Base HP is massive for a tank. Red 4pc's ATK/DMG penalty doesn't matter — you're a tank, not a DPS — and the lost HP heal every 12s is free sustain.
Best Base Items:
| Slot | Item | Base Stats (max) | Special | Why |
|---|---|---|---|---|
| Weapon | Stonbre (Sword) | ATK 3,750 / DEF 1,250 | Block Rate | Only sword with DEF top stat. Block Rate stacks with Moogle 2pc (+15%) and Tier 3B2's per-taunt DR stacking. DEF bonus feeds Rock Dragon's DEF scaling |
| Armor | Reptao Rock (Heavy) | HP 51,875 / DEF 3,937 | Block Rate | Highest HP armor in the game. Rock Dragon drains 5% HP every 5s — bigger HP pool = more drain you can absorb while gaining DEF stacks. Block Rate stacks with Moogle 2pc + Stonbre |
| Armor | Orr Brass (Heavy) | HP 40,625 / DEF 5,125 | DMG Reduction | Alternative: if your healer can handle  Rock Dragon's drain, the extra DEF + DMG Reduction provide more raw mitigation Rock Dragon's drain, the extra DEF + DMG Reduction provide more raw mitigation |
| Ring | Whisper Ring | HP 25,000 / ATK 1,875 | Recovery Effect + Poison Amp | Highest HP ring. Recovery Effect is doubled by Moogle 4pc (+100% HP Recovery) — every heal on you is amplified twice. Irreplaceable for tank sustain |
| Amulet | Thorned Heart | HP + ATK | DMG Reduction | DMG Reduction stacks additively with Tier 3B2's per-taunt stacking (7% per taunt, x15 stacks). Pushes total DR toward cap |
HP vs DEF choice: Reptao Rock gives 28% more HP than Orr Brass, but Orr Brass gives 30% more DEF. For Taunt Warriors who facetank everything, Reptao Rock is better because Rock Dragon's drain is HP-based and the Moogle red 2pc (+25% Base HP) multiplies a bigger number. Use Orr Brass for Shield Wall instead (see below).
Affix Priority: Equipment DEF% > DMG Reduction% > Block Rate
 Whirlwind Warrior
Set: Lilith — 4pc
| Pc | Yellow Bonus | Red Bonus |
|---|---|---|
| 2 | +350 Lightning ATK | Crit DMG + Lightning Resist +20% |
| 3 | +30% Lightning ATK% | — |
| 4 | 50% Lightning ATK → Crit Value | Lightning AoE damage/sec, 25% stun chance |
Why Lilith: The 4pc yellow is the build's engine — every Lightning ATK point gives both damage AND crit. Red 2pc's +20% Crit DMG compounds on the free crit you're already getting. Red 4pc adds constant AoE lightning with 25% stun — free crowd control.
Best Base Items:
| Slot | Item | Base Stats (max) | Special | Why |
|---|---|---|---|---|
| Weapon | Excalika (Sword) | HP 3,125 / ATK 4,687 | Lightning Amp | Only sword with Lightning Amp. This is the single most important base item for the build — Lightning Amp directly scales every Whirlwind tick via 20x lightning scaling |
| Armor | Rune Crystal (Heavy) | HP 41,875 / DEF 5,125 | Skill DMG | No heavy armor has Lightning Amp. Skill DMG is the next best offensive special — directly boosts Whirlwind Slash damage. Highest DEF among top-HP heavies |
| Armor | Nia Mithril (Heavy) | HP 43,750 / DEF 4,687 | All Resist | Alternative: more HP and All Resist for survivability in elemental-heavy content. No offensive synergy |
| Ring | Lilith Ring | ATK 2,100 / DEF 1,312 | Lightning ATK% | Set piece. Lightning ATK% feeds both damage AND crit via Lilith 4pc's Lightning→Crit conversion |
| Amulet | Lilith Amulet | ATK 2,100 / DEF 1,312 | ATK Speed | Set piece. ATK Speed = more Whirlwind ticks per second = more Lightning damage |
No Heavy armor has Lightning Amp. Lightning Amp only exists on Sander Robe (Mage-only). Warriors must get their Lightning scaling from weapon (Excalika), set bonuses (Lilith 2pc/3pc), gems (
Citrine), and affixes. This makes Lilith 4pc even more important — it's the primary Lightning scaling engine.
Affix Priority: Lightning ATK% > Equipment ATK% > Crit Rate (until Lilith 4pc caps your crit)
 Shield Wall Warrior
Set: Moogle — 4pc
Same set and bonuses as Taunt Warrior.
Why Moogle for Shield Wall: Chrysalis heals 150% of your DEF when its shield breaks. Moogle 4pc doubles this to effectively 300% DEF. Shield Wall's 40% DR + Moogle's +15% Block means many hits are fully mitigated. Red 2pc's +25% Base HP makes your shield absorb pool larger.
Best Base Items:
| Slot | Item | Base Stats (max) | Special | Why |
|---|---|---|---|---|
| Weapon | Stonbre (Sword) | ATK 3,750 / DEF 1,250 | Block Rate | Only sword with DEF top stat. DEF directly increases Chrysalis shield size AND heal-on-break (150% DEF). Every DEF point is triple-value: mitigation + shield + heal |
| Armor | Orr Brass (Heavy) | HP 40,625 / DEF 5,125 | DMG Reduction |  Chrysalis heals 150% of DEF on shield break — Moogle 4pc doubles this to 300% DEF. Orr Brass's DEF 5,125 means each shield break heals ~15,375 base (before Moogle doubling). DMG Reduction stacks with Shield Wall's 40% DR Chrysalis heals 150% of DEF on shield break — Moogle 4pc doubles this to 300% DEF. Orr Brass's DEF 5,125 means each shield break heals ~15,375 base (before Moogle doubling). DMG Reduction stacks with Shield Wall's 40% DR |
| Armor | Aeon Steel (Heavy) | HP 37,500 / DEF 5,625 | DMG Reduction | Highest DEF armor. Even bigger Chrysalis heals but less HP pool. Best if you trust your shield cycle and don't need the HP buffer |
| Ring | Whisper Ring | HP 25,000 / ATK 1,875 | Recovery Effect + Poison Amp | Recovery Effect amplifies Chrysalis's heal-on-break AND is doubled by Moogle 4pc — multiplicative stacking. Highest HP ring for buffer |
| Amulet | Thorned Heart | HP + ATK | DMG Reduction | DMG Reduction stacks with Shield Wall (40%) + Orr Brass/Aeon Steel (DMG Reduction special) for layered mitigation |
Key difference from Taunt: Taunt wants Reptao Rock (max HP) because Rock Dragon drains HP. Shield Wall wants Orr Brass or Aeon Steel (max DEF) because Chrysalis heals from DEF. Same set, different base items.
Affix Priority: Equipment DEF% > DMG Reduction% > Equipment HP%
 Ground Slash Warrior
T4A — Auto-Attack Path
Set: Shackled Enemy — 4pc
| Pc | Yellow Bonus | Red Bonus |
|---|---|---|
| 2 | +15% Auto DMG | ATK + DMG Bonus +5% |
| 3 | +20% Dodge | — |
| 4 | 20% auto-heal on hit | Auto: -5% enemy Crit Rate per hit (5s, x20 stacks) |
Why Shackled Enemy: The 2pc +15% Auto DMG stacks with Blaze Lord's +90% for +105% combined. The 4pc 20% auto-heal offsets Blaze Lord's -10% HP drain per auto. Red 4pc's crit shred on enemies means the longer you fight, the safer you get.
Best Base Items:
| Slot | Item | Base Stats (max) | Special | Why |
|---|---|---|---|---|
| Weapon | Igniir (Sword) | ATK 4,875 | Auto DMG | Highest ATK sword. Auto DMG stacks with Shackled Enemy 2pc (+15%) and Blaze Lord (+90%) for +105% total Auto DMG — the core damage multiplier |
| Armor | Reptao Rock (Heavy) | HP 51,875 / DEF 3,937 | Block Rate |  Blaze Lord drains -10% HP per auto-attack. Highest HP armor gives the biggest possible HP pool to sustain the drain. Block Rate provides free mitigation between autos Blaze Lord drains -10% HP per auto-attack. Highest HP armor gives the biggest possible HP pool to sustain the drain. Block Rate provides free mitigation between autos |
| Ring | Shackled Enemy Ring | HP 10,500 / ATK 2,362 | Dodge | Set piece. Dodge stacks with 3pc (+20%) for melee survivability — you're constantly in danger auto-attacking |
| Amulet | Shackled Enemy Amulet | HP 10,500 / ATK 2,362 | Dodge | 4pc completion. 4pc's 20% auto-heal on hit directly offsets Blaze Lord's HP drain |
T4B — Burst Path
Set: Gudrun — 4pc
| Pc | Yellow Bonus | Red Bonus |
|---|---|---|
| 2 | +5% ATK | Skill DMG +10% |
| 3 | Ground Slash +25% DMG | — |
| 4 | Ground Slash kill → 20% HP heal | Ground Slash +45% Crit Rate |
Why Gudrun: Designed for Ground Slash. The 3pc yellow gives +25% Ground Slash DMG. Red 4pc gives +45% Crit Rate on Ground Slash — near-guaranteed crits on your 850% base skill. With T4B's double-cast, that's two massive crits in rapid succession.
Best Base Items:
| Slot | Item | Base Stats (max) | Special | Why |
|---|---|---|---|---|
| Weapon | Gudrun Sword | ATK 4,095 | Skill DMG | Set piece. Skill DMG directly boosts Ground Slash's 850% base multiplier — the core of this burst build |
| Weapon | Leonhort (Sword) | HP 9,375 / ATK 4,062 | Fire Amp | Alternative: highest HP weapon in the game. Fire Amp doesn't help physical Ground Slash, but the HP pool matters for melee warriors |
| Armor | Rune Crystal (Heavy) | HP 41,875 / DEF 5,125 | Skill DMG | Double Skill DMG stacking (weapon + armor). Every % Skill DMG multiplies both casts of T4B's double Ground Slash. High HP + highest DEF combo among top heavies |
| Ring | Gudrun Ring | ATK 2,100 / DEF 1,837 | Skill DMG | Set piece. Triple Skill DMG stacking across weapon + armor + ring. Each piece amplifies the 850% base |
| Amulet | Fatal Heart | HP + ATK + DEF | Crit DMG | Red 4pc gives Ground Slash +45% Crit Rate — near-guaranteed crits. Crit DMG top stat makes every crit devastating across both double-cast hits |
Affix Priority: Equipment ATK% > Crit Rate > Skill DMG%
 Leap Slash Warrior
Set: Cruel Angel — 4pc
| Pc | Yellow Bonus | Red Bonus |
|---|---|---|
| 2 | +20% Elite DMG | ATK Speed +30% |
| 3 | +25% Crit Rate | — |
| 4 | +45% Crit DMG | On death: team gets double set + card bonuses |
Why Cruel Angel: Leap Slash is burst — you leap, stun, crit into defense-shredded targets. +25% Crit Rate + +45% Crit DMG directly multiply this burst window. Red 2pc's +30% ATK Speed means faster autos during the stun window. The red 4pc death bonus is insurance for hard content.
Best Base Items:
| Slot | Item | Base Stats (max) | Special | Why |
|---|---|---|---|---|
| Weapon | Igniir (Sword) | ATK 4,875 | Auto DMG | Highest ATK sword. After leaping and stunning, you auto-attack during the 2-3s stun window. Auto DMG + Blaze Lord's +90% = devastating burst in that window |
| Weapon | Excalika (Sword) | HP 3,125 / ATK 4,687 | Lightning Amp | Alternative: HP bonus helps survive diving. Lightning Amp for mixed damage if running hybrid elemental |
| Armor | Reptao Rock (Heavy) | HP 51,875 / DEF 3,937 | Block Rate | You leap INTO enemy packs — massive HP pool is non-negotiable for diver survivability. Block Rate randomly negates hits during your vulnerable landing. Cruel Angel set armor only has 26,250 HP — Reptao Rock has nearly double |
| Ring | Cruel Angel Ring | HP 10,500 / ATK 2,100 | Crit DMG | Set piece. Crit DMG compounds with Cruel Angel 4pc (+45% Crit DMG) for massive burst on stunned, defense-shredded targets |
| Amulet | Cruel Angel Amulet | HP 10,500 / ATK 2,100 | Crit DMG | 4pc completion. Triple Crit DMG from ring + amulet specials + set 4pc bonus |
Why Reptao Rock over Cruel Angel Heavy? Cruel Angel's set heavy armor only has HP 26,250 — the lowest of any set. Reptao Rock has HP 51,875, nearly double. You only need 2 set pieces from ring + amulet and 2 more from weapon + armor, so using a non-set armor with massively better stats is the right call. If you need the set armor piece for 4pc, compensate with HP affixes.
Affix Priority: Equipment ATK% > Crit Rate > Crit DMG
Base Item Rankings — Full Reference
Use these to pick the best base item for any slot based on your priority stat.
Weapon — ATK Rankings (by class)
Sword (Warrior)
| Rank | Item | Max ATK | Max HP | Max DEF | Special |
|---|---|---|---|---|---|
| 1 | Igniir | 4,875 | — | — | Auto DMG |
| 2 | Erelica | 4,750 | — | — | Skill CDR |
| 3 | Excalika | 4,687 | 3,125 | — | Lightning Amp |
| 4 | Leonhort | 4,062 | 9,375 | — | Fire Amp |
| 5 | Stonbre | 3,750 | — | 1,250 | Block Rate |
Bow (Archer)
| Rank | Item | Max ATK | Max HP | Max DEF | Special |
|---|---|---|---|---|---|
| 1 | Broesht | 5,000 | — | — | Skill CDR |
| 2 | Flemrad | 4,812 | — | — | Auto DMG |
| 3 | Fronihesis | 4,562 | 3,750 | — | Ice Amp |
| 4 | Gronpnier | 4,437 | 6,250 | — | Lightning Amp |
| 5 | Sprelrz | 4,062 | — | 937 | Summon DMG |
| 5 | Perish | 4,062 | — | 937 | Poison Amp |
Staff (Mage)
| Rank | Item | Max ATK | Max HP | Max DEF | Special |
|---|---|---|---|---|---|
| 1 | Shand | 5,062 | — | — | Skill CDR |
| 2 | Sareka | 4,875 | — | — | Auto DMG |
| 3 | Briza | 4,687 | — | — | Ice Amp |
| 4 | Filem | 4,562 | 6,250 | — | Fire Amp |
| 5 | Perish | 4,062 | — | 1,437 | Poison Amp |
Armor — HP Rankings (by class)
Heavy (Warrior)
| Rank | Item | Max HP | Max DEF | Special |
|---|---|---|---|---|
| 1 | Reptao Rock | 51,875 | 3,937 | Block Rate |
| 2 | Nia Mithril | 43,750 | 4,687 | All Resist |
| 3 | Rune Crystal | 41,875 | 5,125 | Skill DMG |
| 4 | Orr Brass | 40,625 | 5,125 | DMG Reduction |
| 5 | Aeon Steel | 37,500 | 5,625 | DMG Reduction |
Leather (Archer)
| Rank | Item | Max HP | Max DEF | Special |
|---|---|---|---|---|
| 1 | Spy Leather | 45,625 | 2,687 | Skill CDR |
| 2 | Vanguard Leather | 45,000 | 3,312 | Crit DMG |
| 3 | Scout Leather | 41,250 | 3,875 | Dodge |
| 4 | Hunter Leather | 37,500 | 4,250 | Crit Rate |
| 5 | Beastmaster Leather | 36,250 | 4,375 | Summon Inherit |
Robe (Mage)
| Rank | Item | Max HP | Max DEF | Special |
|---|---|---|---|---|
| 1 | Pai Robe | 42,500 | 3,125 | Poison Amp |
| 2 | Chant Robe | 41,875 | 2,187 | Skill CDR |
| 3 | Sander Robe | 41,250 | 2,687 | Lightning Amp |
| 4 | Furan Robe | 40,625 | 2,750 | Fire Amp |
| 5 | Ace Robe | 40,000 | 2,625 | Ice Amp |
Armor — DEF Rankings (by class)
Heavy (Warrior)
| Rank | Item | Max DEF | Max HP | Special |
|---|---|---|---|---|
| 1 | Aeon Steel | 5,625 | 37,500 | DMG Reduction |
| 2 | Rune Crystal | 5,125 | 41,875 | Skill DMG |
| 2 | Orr Brass | 5,125 | 40,625 | DMG Reduction |
| 4 | Nia Mithril | 4,687 | 43,750 | All Resist |
| 5 | Reptao Rock | 3,937 | 51,875 | Block Rate |
Leather (Archer)
| Rank | Item | Max DEF | Max HP | Special |
|---|---|---|---|---|
| 1 | Beastmaster | 4,375 | 36,250 | Summon Inherit |
| 2 | Hunter | 4,250 | 37,500 | Crit Rate |
| 3 | Scout | 3,875 | 41,250 | Dodge |
| 4 | Vanguard | 3,312 | 45,000 | Crit DMG |
| 5 | Spy | 2,687 | 45,625 | Skill CDR |
Robe (Mage)
| Rank | Item | Max DEF | Max HP | Special |
|---|---|---|---|---|
| 1 | Pai Robe | 3,125 | 42,500 | Poison Amp |
| 2 | Furan Robe | 2,750 | 40,625 | Fire Amp |
| 3 | Sander Robe | 2,687 | 41,250 | Lightning Amp |
| 4 | Ace Robe | 2,625 | 40,000 | Ice Amp |
| 5 | Chant Robe | 2,187 | 41,875 | Skill CDR |
Armor — ATK Rankings
Armor pieces do not have base ATK. All armor top stats are HP + DEF only. ATK on armor comes exclusively from affixes (bottom stats).
Ring — Rankings (Universal, all classes)
By HP
| Item | Source | Max HP | Max ATK | Max DEF | Special |
|---|---|---|---|---|---|
| Whisper Ring | Red | 25,000 | 1,875 | — | Heal + Poison Amp |
| Guttorm Ring |
Set | 23,625 | 1,050 | — | Summon DMG |
| Dark Ranger Ring | Set | 21,000 | 1,050 | — | Holy ATK% |
| Exquisite Ring | Set | 18,375 | 1,837 | — | Poison Resist |
| Maruka Ring | Set | 15,750 | 2,100 | — | Crit Rate |
| Fordedid Ring | Set | 15,750 | 1,575 | — | Poison ATK% |
| Delusion Ring | Set | 15,750 | — | 1,837 | Block DR |
By ATK
| Item | Source | Max ATK | Max HP | Max DEF | Special |
|---|---|---|---|---|---|
| Belissar Ring | Set | 3,150 | — | — | Shield DMG |
| Burning Ground Ring | Set | 2,625 | 7,875 | — | Fire ATK% |
| Shackled Enemy Ring | Set | 2,362 | 10,500 | — | Dodge |
| Dominator Ring | Red | 2,250 | — | 1,125 | DMG Bonus |
| Maruka Ring | Set | 2,100 | 15,750 | — | Crit Rate |
| Cruel Angel Ring | Set | 2,100 | 10,500 | — | Crit DMG |
| Shadow Fighter Ring | Set | 2,100 | 10,500 | — | Crit Rate |
| Moogle Ring |
Set | 2,100 | 13,125 | — | HP% |
| Lilith Ring | Set | 2,100 | — | 1,312 | Lightning ATK% |
| Sun Blaze Ring | Red | 2,062 | varies | varies | Skill DMG + Fire Amp |
Amulet — Rankings (Universal, all classes)
By HP
| Item | Source | Max HP | Other Stats | Special |
|---|---|---|---|---|
| Valor Heart | Red | 28,125 | DEF 1,875 | Crit Rate |
| Delusion Amulet | Set | 21,000 | ATK 1,575 | Block DR |
| Fatal Heart | Red | 18,750 | ATK 937, DEF 2,000 | Crit DMG |
| Wotan Amulet | Set | 18,375 | DEF 2,362 | Summon Duration |
| Exquisite Amulet | Set | 18,375 | ATK 1,837 | Lightning Resist |
| Belissar Amulet | Set | 18,375 | ATK 1,837 | Shield DMG |
By ATK
| Item | Source | Max ATK | Max HP | Max DEF | Special |
|---|---|---|---|---|---|
| Shackled Enemy Amulet | Set | 2,362 | 10,500 | — | Dodge |
| Guttorm Amulet |
Set | 2,362 | 10,500 | — | Summon DMG |
| Cruel Angel Amulet | Set | 2,100 | 10,500 | — | Crit DMG |
| Shadow Fighter Amulet | Set | 2,100 | 10,500 | — | Crit Rate |
| Gudrun Amulet | Set | 2,100 | — | 1,837 | Skill DMG |
| Burning Ground Amulet | Set | 2,100 | — | 1,312 | Fire ATK% |
| Lilith Amulet | Set | 2,100 | — | 1,312 | ATK Speed |
Set Piece Base Stats — Quick Reference
Not all sets are equal in raw stats. Here's how set armor pieces compare:
Set Armor HP Comparison (by class type)
| Set | Heavy (Warrior) | Leather (Archer) | Robe (Mage) | Notes |
|---|---|---|---|---|
| Mutant | 34,125 | 34,125 | 34,125 | Highest HP set armor |
| Guttorm | 34,125 | 34,125 | 34,125 | Tied highest |
| Burning Ground | 34,125 | 34,125 | 34,125 | Tied highest |
| Gudrun | 34,125 | — | — | Warrior only |
| Delusion | 34,125 | 34,125 | 34,125 | Tied highest |
| Wotan | — | — | 34,125 | Mage only |
| Moogle |
31,500 | — | — | Warrior only |
| Fordedid | 31,500 | 31,500 | 31,500 | Average |
| Shadow Fighter | 31,500 | 31,500 | 31,500 | Average |
| Dark Ranger | — | 31,500 | — | Archer only |
| Lilith | 31,500 | 31,500 | 31,500 | Average |
| Maruka | 31,500 | 31,500 | 31,500 | Average |
| Belissar | — | 28,875 | — | Archer only. Lower HP |
| Shackled Enemy | 28,875 | 28,875 | 28,875 | Lower HP |
| Cruel Angel | 26,250 | 26,250 | 26,250 | Lowest HP set armor |
Takeaway: If you need a high-HP set piece, Mutant/Guttorm/Burning Ground/Delusion/Gudrun/Wotan all share the highest base at 34,125. Cruel Angel has the lowest at 26,250 — Leap Slash warriors should compensate with HP affixes or use a non-set armor like Reptao Rock.